The Echoes of Aincrad demo has three bosses worth a data entry: the Sentry Golem and Illfang the Kobold Lord in the prologue dungeon, plus the field elite Raging Boar out in the open world. This is the data view — the comparison table, attack lists and quick strategy for each. For the full phase-by-phase walkthroughs, follow the links to each boss guide.
Evidence basis. Boss names, phases and mechanics are cross-checked against visible demo interfaces and multiple walkthroughs listed in each JSON entry. The database includes only encounters supported by that evidence set.
How demo bosses work
Three fundamentals carry every fight below, so it's worth internalising them once. First, defense beats greed — the demo's bosses don't have fast, unreactable moves; their damage comes from punishing players who over-commit. Bait an attack, answer it, take one clean hit, reset. Second, parry and dodge do different jobs: heavy, unblockable-feeling slams want a dodge (roll through them), while telegraphed sweeps and combo finishers want a parry that opens a punish window. Third, Iori is part of your kit — your partner holds aggro, adds damage, and the Switch lets you tag her in to recover stamina or reposition. Read the table, then drop into any entry for specifics.
Story bosses, field bosses and Arks
The demo splits its big fights into two kinds. Story bosses — the Sentry Golem and Illfang — are gated set-pieces on the critical path through the prologue dungeon; you can't miss them, and each is a scripted difficulty step. Field bosses like the Raging Boar roam the open world beyond the Town of Beginnings, optional but far tougher than the fodder around them, and they're where the demo tests whether you actually learned the dungeon's lessons. Both kinds are fought at Arks — the game's term for its boss and elite arenas. Two things follow from that: there's no shop inside an Ark, so you stock consumables before you enter, and your partner Iori is with you for all of them. Treat every Ark the same way — prep first, read the tells, punish from safety.
Fighting with Iori
Every boss below is a two-hander in a different sense: Iori fights with you the whole time, and using her well is often the difference between a clean win and a frantic one. She does three jobs. She holds aggro, buying you space to reposition or heal. She enables Combination Skills — team-up attacks that hit harder than anything you land alone. And she brings Support Skills for buffs and healing when a fight drags. The connective tissue is the Switch: tag Iori in to cover you while your stamina refills, then tag back to punish. Against a slow boss like the Sentry Golem, a parry into Iori's charged thrust is your cleanest opening; against Illfang, a good Switch rhythm keeps your gauge topped for his finisher windows. Don't treat her as scenery.
All demo bosses at a glance
| Boss | Type | Phases | Difficulty |
|---|---|---|---|
| Sentry Golem | Story boss — first demo boss | 1 | Moderate |
| Illfang the Kobold Lord | Story boss — demo finale | 3 | Hard |
| Raging Boar | Field boss (elite) — Lv. 10 | — | Tough (early) |
Jump to: Sentry Golem · Illfang the Kobold Lord · Raging Boar.
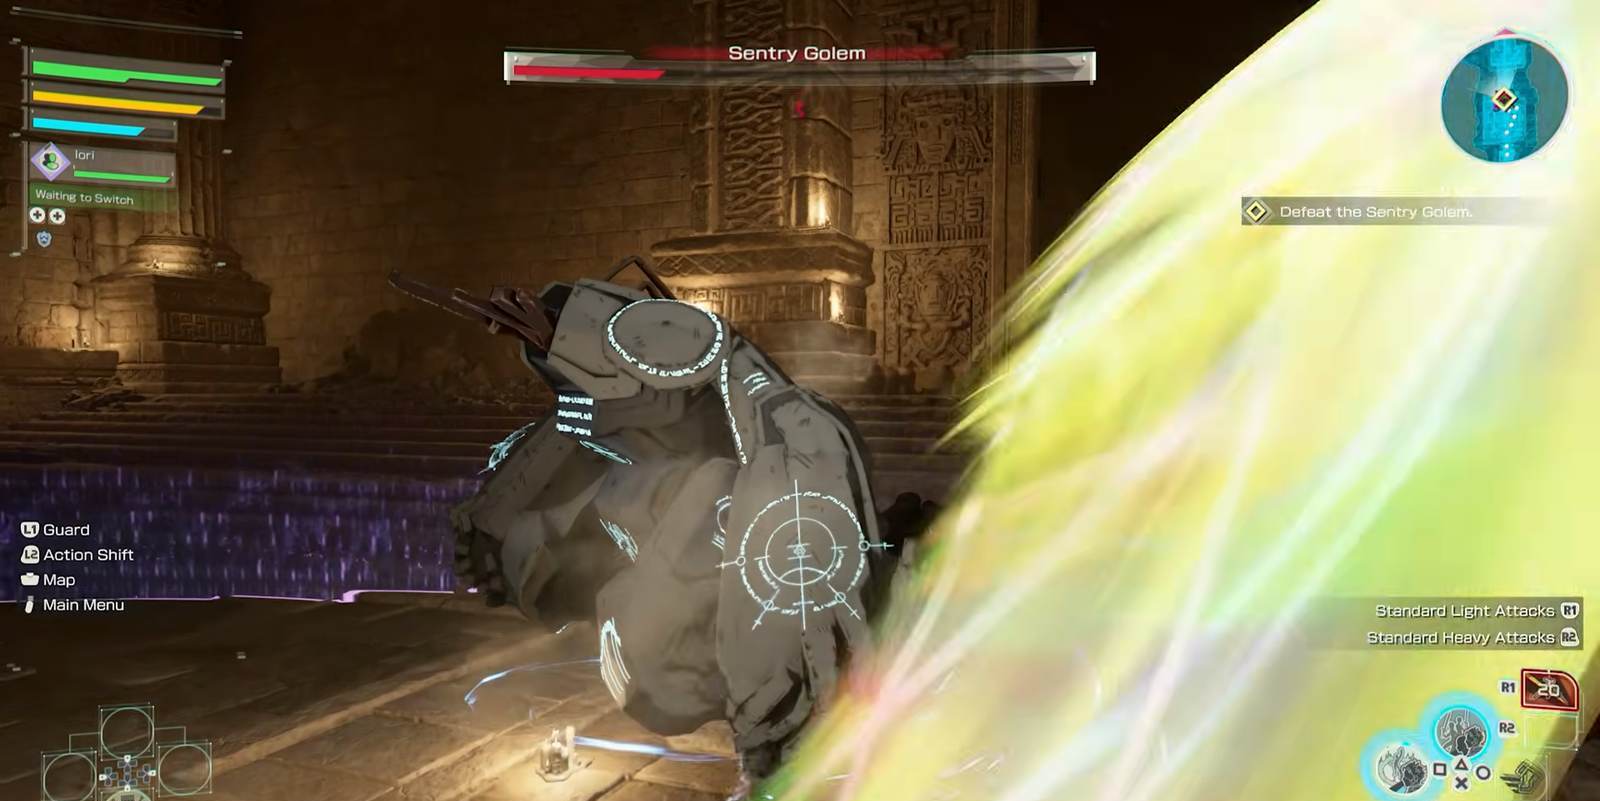
Sentry Golem
| Type | Story boss — first demo boss |
|---|---|
| Location | Prologue dungeon, first resting point |
| Phases | 1 |
| Difficulty | Moderate |
| Partner | Iori |
| Recommended | Charged-heavy weapons (mace, two-handers), or any mobile weapon to circle |
The Sentry Golem is the demo teaching you its grammar. It's slow, honest, and built to make you practice defense before the real test — circle behind it, punish from safety, and you've learned everything Illfang will demand. Brute-force it instead and the final boss becomes a wall you didn't prepare for.
Attacks & answers:
- Overhead slam — Roll through it — do not block.
- Ground sweep — Parry, then follow with Iori's charged thrust.
Fastest approach: Live behind it and punish only from safety; dodge the slam, parry the sweep.
→ Full phase-by-phase strategy in the Sentry Golem boss guide.
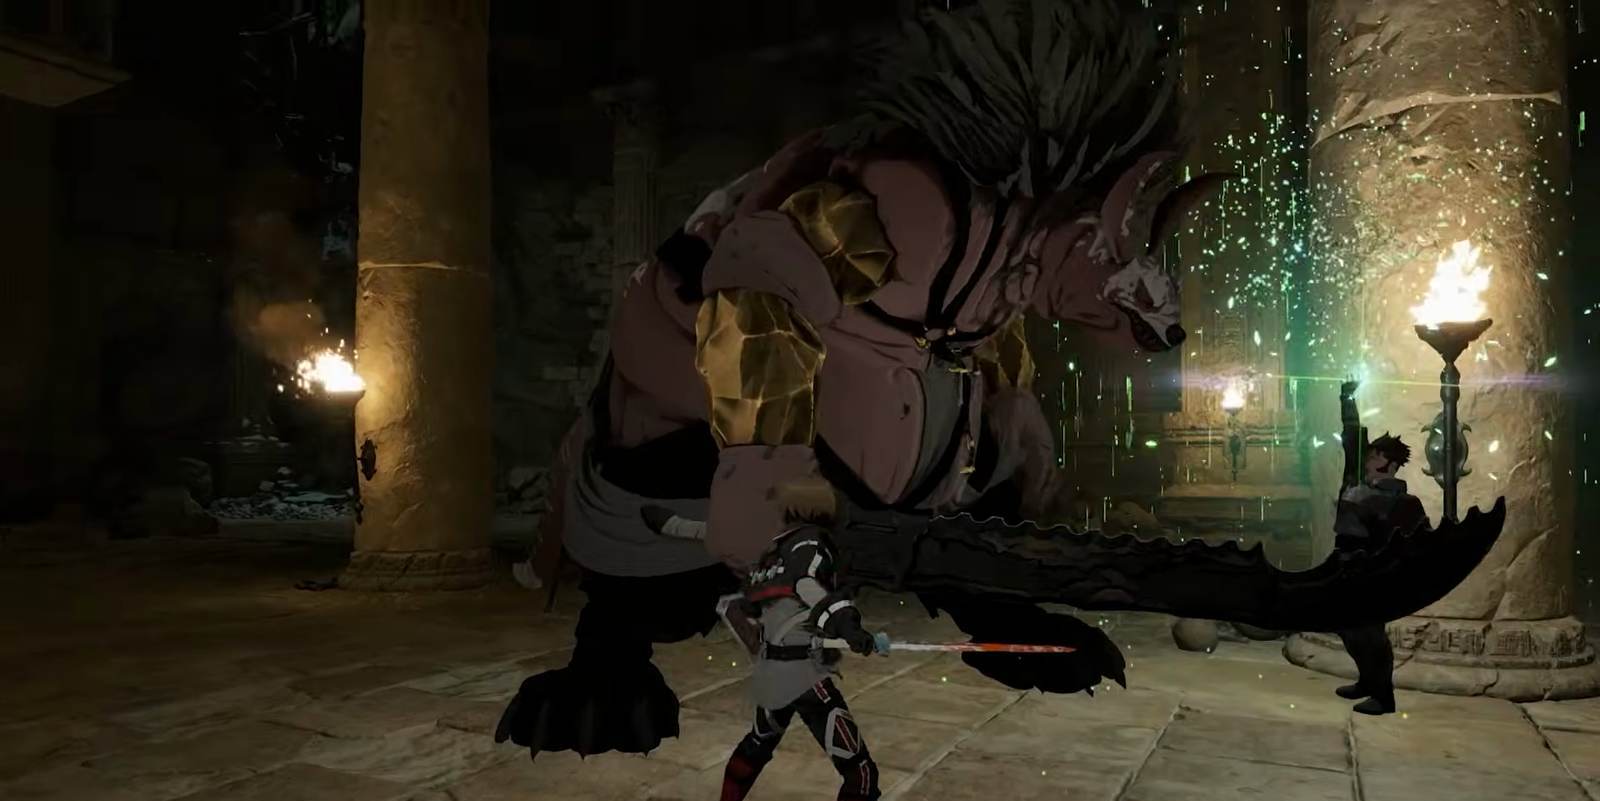
Illfang the Kobold Lord
| Type | Story boss — demo finale |
|---|---|
| Location | Prologue dungeon, final arena |
| Phases | 3 |
| Difficulty | Hard |
| Partner | Iori |
| Recommended | Fast punisher — one-handed sword, rapier or dagger |
Illfang is the graduation exam — the Floor 1 boss the anime made infamous, rebuilt to punish the exact greed the earlier rooms let you get away with. Every fundamental returns here harder and faster, and the finisher rule catches almost everyone on their first attempt: drain a bar without closing it, and you simply do the work twice.
Attacks & answers:
- 360° ground sweep — Create distance or dodge through it before it lands.
- Charged roar (summons fodder) — Block, then clear the adds before re-engaging.
Fastest approach: Bait his combos, parry the finisher, answer with one sword skill. Never get greedy.
→ Full phase-by-phase strategy in the Illfang the Kobold Lord boss guide.
Raging Boar

| Type | Field boss (elite) — Lv. 10 |
|---|---|
| Location | Open field beyond the Town of Beginnings |
| Phases | — |
| Difficulty | Tough (early) |
| Partner | Iori |
| Recommended | A few Town of Beginnings levels and a full healing stock before you engage |
The Raging Boar is the open world showing its teeth. Where corridor fodder tolerates sloppiness, this Lv. 10 field elite is an early gatekeeper that flattens anyone who wanders in underprepared. This entry focuses on the charging behavior visible in the cited demo footage and does not invent a complete moveset.
A charging field elite fought in the open, well above corridor fodder — the fight rewards spacing and a healing stock over raw aggression.
Fastest approach: An early field gatekeeper that flattens underprepared players; stock healing, bait the charge, and punish the recovery window before it turns.
Matching your weapon to the fight
Because combat runs on the stamina-and-SP economy, the "right" weapon shifts a little per boss. None of this is mandatory — any of the six weapon types clears the demo — but if you're optimising, this is the shorthand:
| Boss | Leans toward | Why |
|---|---|---|
| Sentry Golem | Charged-heavy weapons (mace, two-handers) | Its poor tracking lets you circle behind and land big charged hits into the back; the mace's stagger identity is at home against a slow, armored target. |
| Illfang the Kobold Lord | Fast punishers (one-handed sword, rapier, dagger) | His openings reward a single quick sword skill, not a long committal combo — and mobility keeps you clear of the 360° sweep. |
| Raging Boar | Mobility over commitment | A large charging beast rewards staying nimble; commit lightly until its full moveset is documented. |
The through-line: slow, armored bosses reward charged heavies from safety; fast, punishing bosses reward mobile single-skill punishes. The demo is short enough to try both approaches, and since your progress transfers to the full game, experimenting now costs you nothing.
Reading the demo's difficulty curve
The three bosses form a deliberate ramp. The Sentry Golem is a controlled tutorial — one health bar, two moves, forgiving windows. Illfang raises every dial at once: three phases, a healing gimmick, and combos that end runs if you get greedy. The Raging Boar sits off to the side as an optional spike, proof that the open field plays by tougher rules than the guided corridor. If a fight feels unfair, it's almost always the same root cause — attacking when you should be defending. Slow down, let the boss commit, and answer with exactly one punish.
FAQ
How many bosses are in the Echoes of Aincrad demo?
What is the hardest boss in the demo?
Do I fight the demo bosses alone?
Where to go next
Prep for the fights with the full demo walkthrough, pick a weapon that suits your punish rhythm in the weapons database, or read up on the mode where losing to any of these bosses would be permanent in the Death Game Mode guide.
Sources
Boss mechanics cross-checked from the playable demo and independent walkthroughs; per-entry sources are listed in each JSON record. Gameplay frames captured from the Echoes of Aincrad demo (player-captured footage credited in the asset library).